
Why a Disciplined RO Commissioning Sequence Matters
RO system installation and commissioning is the controlled, multi-stage process of site preparation, membrane loading, and sequential startup that brings a reverse osmosis plant from delivered equipment to spec-compliant permeate. The full 11-step commissioning sequence holds inlet pressure below 0.5 MPa for the first 5-minute flush, ramps to a 1.0–1.4 MPa operating inlet, and diverts the first 24 hours of permeate and concentrate to drain — not back to the RO inlet — to prevent irreversible membrane flux loss.
The two dominant new-equipment contamination risks are mechanical and chemical. First, metal debris and PVC swarf left in welded piping cause irreversible scratches on RO diaphragms the moment high-pressure flow begins; the only fix is a full pipeline flush before element insertion. Second, an uneven anti-corrosion coating inside the storage tank releases organic compounds that directly foul the membrane on first contact — the documented mitigation is a 24-hour pH=2 hydrochloric acid soak followed by a full drain. A single improper startup — for example, pressurising the high-pressure pump against a closed concentrate valve, or recycling new-membrane permeate into a secondary RO — drives irreversible flux loss that costs tens of thousands of dollars in element replacement plus 2–4 weeks of cleaning-in-place cycles. The pages that rank for this query split the procedure across three or four separate documents; the field engineer needs the pre-install → install → commission → handover chain in a single record pinned next to the industrial RO system HMI.
Site Readiness and Storage Before the Crew Arrives
Commissioning day should be a controlled procedure, not a scramble. Walk the floor and tick off every prerequisite in the table below before the membrane crate is opened. The two non-negotiables from the equipment manufacturer: equipment must be installed within one month of arrival, and water-tested immediately — long dry storage is not allowed. No valve on the unit may be opened before the first water test run.
| Parameter | Acceptable Range / Rule | Action If Out of Spec |
|---|---|---|
| Ambient temperature at installation point | 5–38 °C | Add forced ventilation when ambient exceeds 35 °C |
| Time on site before installation | ≤ 1 month from delivery | Escalate to OEM; do not store dry for extended periods |
| Foundation level and load-bearing | Equipment support points leveled, full contact with foundation | Shim or grout before positioning the skid |
| Product-water lift height | ≤ 8 m to permeate header | Add a transfer pump if lift exceeds 8 m |
| Three-phase power | Rated voltage ±10% at the high-pressure pump starter | Verify with the EPC; do not run on temporary generators |
| Feedwater analysis | Complete ionic analysis on file, compared to RO inlet spec | Adjust pretreatment before energising the high-pressure pump |
| Pretreatment media | Multi-media filter loaded, backwashed, and soaked per supplier | Run backwash cycle until discharge runs clear (see multi-media pretreatment filter spec) |
Open the feedwater analysis against the RO inlet spec at least 48 hours before the crew arrives. The first three commissioning steps (analyse, adjust the high-pressure pump pressure control, inspect all pipeline connections) all depend on having that analysis in hand.
Pressure Vessel and Membrane Loading Procedure
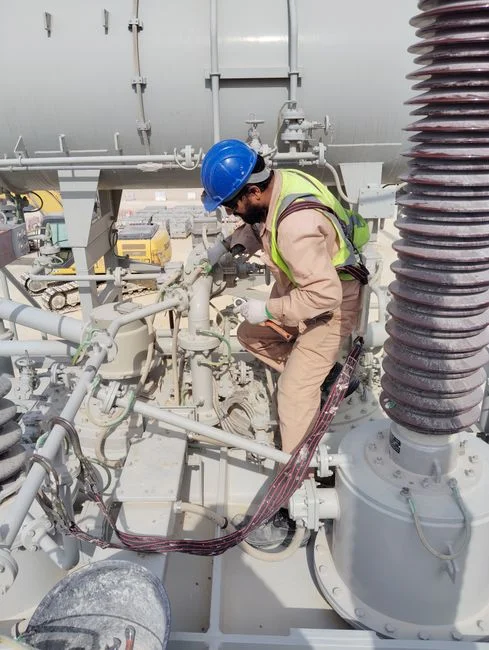
Membrane loading is the most detail-sensitive stage because the two irreversible damage modes — scratched diaphragms from debris and dry-out from delayed wetting — both happen here. Work clean, work sequentially, and never load an element you have not personally inspected.
- Vessel inspection. Inspect every pressure vessel for internal abrasion or damage. Replace any leaking vessel. Flush the vessel with water to remove all dust, particles, and corrosion products before any element goes in.
- Casing lubrication. Lubricate the pressure-vessel casing on the beveled surface (range from 1/2 to the beveled surface) using roughly 50% glycerin-water mixture applied with a clean cotton cloth of appropriate size.
- Tank pre-soak for new installations. If the anti-corrosion coating ratio is uneven — a recognised risk on new tanks — soak the tank contents with pH=2 hydrochloric acid for 24 hours and drain fully before commissioning.
- Element inspection. Verify each RO membrane element and pressure vessel visually for defects. Lubricate the connector O-ring with a small amount of the same glycerin mixture, then connect the next element. If any element is defective, contact the RO manufacturer — do not install a suspect element.
- Direction and spacing. Push elements in the direction of feed flow (use a brief high-pressure pump test to confirm direction). Leave roughly 15 cm between the end of one element and the vessel mouth before inserting the next.
- Replacements on an existing unit. Clean the vessel interior with a wire-tied mop and replace the security filter cartridge and any worn valves before loading the new membrane. The security filter change is the cheapest preventive maintenance that catches most early fouling events.
Once all elements are loaded and end caps are reset (use a wooden block and a hammer on the end cap — never strike the cap directly), the system is ready for the flush, soak, and ramp overlay described in the next section.
The 11-Step RO Commissioning Sequence
This is the operational core. Follow the sequence in order; do not skip the early steps to save time — every later step assumes the earlier ones have been completed and verified.
- Feedwater analysis. Analyse and test feedwater against the inlet spec; confirm the result before energising the unit.
- High-pressure pump setup. Adjust the high-pressure pump pressure control to its minimum setting.
- Piping and gauge inspection. Inspect all pipeline connections; confirm every pressure gauge is present and every low-pressure line connection is tight.
- Valve lineup. Open all pressure-gauge switches, the total inlet valve, the concentrate discharge valve, and the permeate discharge valve. The concentrate and permeate valves must be open before the high-pressure pump is started — closing them with the pump running is the single most damaging operator error.
- Pretreatment start. Start the pretreatment plant and set the supply above the unit's total intake.
- Filter backwash. Backwash and rinse the sand/carbon filter until the discharge runs clear and free of any carbon or formaldehyde odor.
- Low-pressure startup flush. Start the high-pressure pump and slowly open the total inlet valve. Hold inlet pressure below 0.5 MPa; flush for 5 minutes; inspect the high- and low-pressure lines and instruments for leaks.
- Ramp to operating pressure. Adjust the inlet and concentrate valves to bring inlet pressure to the 1.0–1.4 MPa operating range.
- Permeate quality check. Test permeate conductivity; open the permeate valve only once it meets the project spec, then close the drain valve.
- Manual then automatic. Run manual single-step operation first; switch to PLC automatic only after stable operation is confirmed.
- Regeneration verification. Start the regeneration system — typically the automatic chemical dosing system tied to the pretreatment loop — and verify it cycles correctly.
Overlaid on this hydraulic sequence is the membrane-specific ramp protocol, which protects new elements from flux loss:
| Stage | Parameter | Value | Source / Reason |
|---|---|---|---|
| Low-pressure flush | Pressure / duration / water quality | 2–4 Bar / 1 hour / clean, oxidant-free | Clears debris and preservative residue |
| Soak | Duration | ≥ 12 hours | Fully wets the membrane before pressurisation |
| High-pressure ramp | Pump ramp rate | < 0.7 Bar/sec | Prevents hydraulic shock to elements and housings |
| Initial permeate and concentrate | Destination for first 24 hours | To drain — not to a primary or secondary RO inlet | Recycling new-membrane permeate into a secondary RO causes irreversible flux loss |
For wastewater-reuse duty, commission on a clean water source first, then transition to 100% effluent gradually on a proportional basis. Unknown organics in raw effluent will foul new membranes faster than any other first-week failure mode.
2026 Update: Digital Commissioning Records and PLC Loop Checks
The 11-step sequence above has not changed mechanically in 2026, but the data layer wrapped around step 10 has. Modern RO skids ship with PLCs that time-stamp inlet pressure, conductivity, flow, and temperature at one-second resolution. Capture those tags rather than relying on handwritten logs; the resulting CSV is an audit-grade commissioning record that satisfies pharmaceutical and semiconductor quality teams and is the only acceptable format for most membrane warranty submissions.
Before enabling PLC automatic mode, walk the loop-check sequence on the HMI: verify the inlet conductivity transmitter against a hand-held meter, confirm both differential pressure transmitters on each stage track the manual gauges, calibrate the permeate and concentrate flowmeters against a bucket-and-stopwatch at low flow, and confirm the high-pressure pump VFD feedback matches the local gauge. Remote video witness testing of the SAT has become standard on export projects — the commissioning engineer should be prepared to stream the 11-step sequence live and walk the witness through each tag in real time. Procurement teams now routinely require ISO 9001:2015 adherence in the technical scope, and the commissioning deliverable should reference that framework. Engineers who have not run a PLC loop check before should review the broader PLC control engineering guide for the I/O checklist that complements this RO-specific sequence.
Commissioning Troubleshooting Matrix
When the sequence goes off the rails, the four failure modes below account for the majority of first-day callouts. Diagnose, correct, then restart from step 7 (low-pressure flush) — never restart from step 8 on a system that has not been re-flushed.
| Symptom | Probable Cause | First Diagnostic Step | Corrective Action |
|---|---|---|---|
| Permeate conductivity stays above spec | Concentrate valve too closed; insufficient cross-flow | Read concentrate flow vs. design; check recovery ratio | Open concentrate valve incrementally; verify recovery matches design |
| High-pressure pump trips on overcurrent | Started against a closed inlet or concentrate valve; air binding | Confirm valve lineup matches step 4; bleed air from pump casing | Re-line valves; restart from step 7 with pump vented |
| Flux drops within the first hour | Oxidant (chlorine) in feed; oil carryover from the high-pressure pump | Test feed for free chlorine; inspect pump for oil seepage | Replace security filter cartridge; add carbon polishing if chlorine persists; service pump seals |
| Permeate appears milky or carries fines | Fouled security filter; carryover from pretreatment | Differential pressure across security filter | Replace security filter cartridge; re-backwash multi-media filter |
The single most damaging recurring error is starting the high-pressure pump with a closed valve — this is the dominant cause of pump seal and membrane housing damage during commissioning. The single most damaging membrane error is recycling the first 24 hours of new-membrane permeate into a secondary RO, which causes irreversible flux loss. Both are listed in the matrix because both are 100% preventable at the procedure level, not the equipment level.
When to Use an OEM Commissioning Service Instead of an In-House Crew
An in-house team can run this 11-step sequence successfully if they have done it before, but not every project should be self-commissioned. Bring in an OEM service when any of the following apply: it is the first RO on the site, the system is a two-pass or high-pressure (>1.4 MPa) design, the permeate target is semiconductor or pharmaceutical grade, or the membrane warranty requires OEM-signed commissioning records. The benchmark scope a competent service should match is the five-step programme of consultation and survey, installation planning, on-site installation, system commissioning, and handover and support — typically delivered by engineers operating under ISO 9001:2015 with full adherence to site safety protocols. Procurement teams should also note that standalone commissioning is available for third-party-supplied skids, so the OEM need not have built the unit. A useful cross-check is the UASB reactor installation and commissioning guide, which applies the same five-step handover logic to a different technology and confirms the structure is industry-standard rather than vendor-specific. For projects in regulated markets where compliance documentation drives cost, the industrial wastewater treatment cost and compliance guide gives a procurement-side view of when OEM commissioning becomes a contractual rather than a technical decision.
Frequently Asked Questions
What is the standard RO commissioning procedure?
The standard procedure is the 11-step sequence: analyse the feedwater, set the high-pressure pump, inspect piping and gauges, line up the valves, start pretreatment, backwash the filters, flush at inlet pressure below 0.5 MPa for 5 minutes, ramp to a 1.0–1.4 MPa operating inlet, check permeate conductivity, switch from manual to PLC automatic, and verify the regeneration system.
How long does RO commissioning take?
Pretreatment backwash, the low-pressure flush, and the 12-hour membrane soak dominate the first 12–24 hours. Steady-state operation on a clean system is typically reached within 48–72 hours, with the 24-hour permeate diversion running in parallel throughout that window.
Why is the first 24 hours of permeate diverted to drain?
New-membrane permeate carries preservative residue and fine particulates from the element manufacturing process. Feeding that stream directly into a secondary RO causes irreversible flux loss in the secondary membrane. Diverting both permeate and concentrate to drain for 24 hours protects the secondary RO and lets the new elements stabilise.
What pressure should an RO system run at?
Hold inlet pressure below 0.5 MPa during the first 5-minute startup flush, then ramp to the 1.0–1.4 MPa operating inlet target. The high-pressure pump ramp rate should stay below 0.7 Bar/sec to avoid hydraulic shock to elements and housings.
Can an RO system be commissioned on wastewater effluent?
Yes, but not directly. Complete the commissioning on a clean water source first, then transition to 100% effluent gradually on a proportional basis. Unknown organics in raw effluent foul new membranes faster than any other first-week failure mode, and a clean commissioning source is essential for wastewater-reuse duty.