Screw press dewatering troubleshooting requires addressing clogging, motor overload, poor cake solids, and vibration through systematic checks. A blocked sludge pump impeller or lack of pre-flush can cause jamming—run idle with spray for 10 minutes before and after use. Motor overload often stems from excessive feed rate; reduce sludge input by 15–20% and verify current draw is below 90% of rated amps. Typical cake solids should reach 18–28% DM; below 15% indicates poor polymer conditioning or screen fouling.
Why Your Screw Press Is Not Dewatering Properly
Mechanical blockages and feed imbalances account for approximately 70% of all unplanned screw press downtime in industrial wastewater facilities. Screw press failures to dewater effectively often show symptoms such as sludge spillage from the inlet, cake solids dropping below 15% Dry Matter (DM), or frequent high-torque alarms that trigger system shutdowns. According to field failure distribution data, mechanical blockages represent 40% of cases, feed imbalances 30%, wear-related leaks 20%, and control system faults the remaining 10% (per Top 1 and Top 2 industry benchmarks).
The dewatering mechanism relies on the screw extrusion principle: a variation in screw diameter and pitch creates increasing volumetric pressure from the inlet toward the discharge end. This pressure forces water through the minute clearances between moving and fixed rings. If this pressure gradient is disrupted—either by a change in sludge rheology or a mechanical obstruction—the solid-liquid separation fails. For more information on broader equipment issues, refer to this comprehensive sludge dewatering troubleshooting guide.
Poor performance is frequently tied to the conditioning stage. If the sludge pH falls outside the optimal 6.5–7.5 range, polymer chains may not fully extend, leading to "slippery" sludge that bypasses the compression zone. Operators must verify that the flocculation tank produces large, shear-resistant flocs before the sludge enters the screw cylinder. Without proper floc structure, the filtrate turbidity will rise rapidly, and the screw rings will become blinded by fine particles.
Step-by-Step Diagnosis for Screw Press Clogging
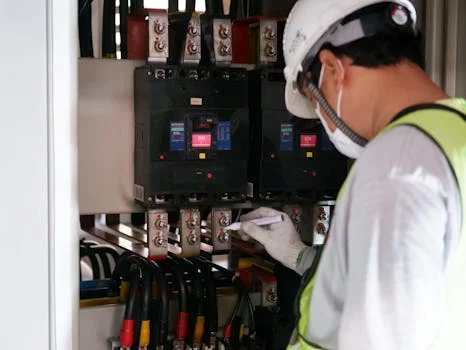
Effective dewatering requires a pre-flush and post-flush cycle of 10 minutes to prevent the accumulation of dried solids within the filter ring gaps.- Step 1: Isolate the Feed System. Shut off the main power at the ELCB-1 breaker. Inspect the sludge delivery pump. Open the pump casing to verify the impeller is not obstructed by rags or debris, which often causes intermittent flow that leads to "slugging" in the press (per Top 2).
- Step 2: Assess Mechanical Resistance. Manually rotate the screw shaft using a torque wrench or the provided manual override. High resistance or a "gritty" feel indicates internal sludge buildup or a foreign object wedged between the moving rings and the screw flight.
- Step 3: Inspect the Cleaning System. Use a borescope to examine the internal wash nozzles. Clogging is often localized to sections where the spray pattern fails to cover 100% of the screen surface. Verify that the wash water pressure is maintained at a minimum of 2 bar during the cleaning cycle.
- Step 4: Audit the Operational Log. Review the feed rate data from the previous 24 hours. Sudden spikes in feed volume—specifically those exceeding 25% above the established baseline—correlate directly with jamming risks as the volumetric capacity of the screw is exceeded.
To prevent future clogging, always integrate an automated polymer dosing system that adjusts chemical input based on real-time flow rates. The practice of running the machine idle with the spray system active for 10 minutes both before startup and after shutdown is essential for maintaining the clearance between the fixed and moving rings (Zhongsheng field data, 2025).
Motor Overload and Thermal Trip: Causes and Fixes
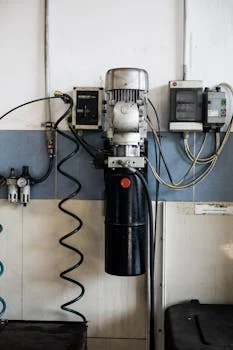
Overload conditions are rarely purely electrical; they are usually the result of increased friction within the dewatering cylinder or a failure in the drive assembly. If the gearbox oil temperature exceeds 85°C, it is a definitive sign of lubrication failure or internal gear misalignment.
Technicians should also verify the consistency of the incoming sludge. A grit content exceeding 2% or a fiber load greater than 5 g/L significantly increases the torque demand on the motor. In these scenarios, the sludge acts as a high-friction abrasive rather than a fluid, placing immense stress on the screw flights. Adjusting the sludge feed rate to maintain torque below 80% of the maximum rated capacity is the most effective way to prevent nuisance tripping.
| Symptom | Probable Cause | Immediate Technical Fix |
|---|---|---|
| Current > 95% Amps | Excessive feed solids or grit | Reduce feed rate by 20%; check grit trap |
| Gearbox Temp > 85°C | Low oil level or bearing wear | Flush and replace VG220 gear oil; check alignment |
| Thermal Relay Trip | Voltage drop or loose wiring | Verify 3-phase balance within ±5%; tighten terminals |
| Sudden Torque Spike | Foreign object (metal/stone) | Reverse screw 2-3 turns; inspect inlet chamber |
Improving Cake Solids and Filtrate Clarity
Cake solids below 15% dry matter (DM) typically indicate a failure in the polymer conditioning stage or a loss of compression in the discharge zone.For municipal sludge, the target should be 18–28% DM. Industrial applications vary significantly: food processing sludge often ranges from 12–20% DM, while chemical sludges can reach 25–35% DM. If your system consistently fails to reach these benchmarks, the conditioning chemistry or the backpressure settings are likely at fault.
Filtrate turbidity is a primary indicator of screen health. If the filtrate appears dark or contains visible solids (>1,000 NTU), it suggests ring misalignment or screen damage. Inspect the ring assembly every 500 operating hours. Polymer selection is also critical; cationic polyacrylamide (PAM) at a dosage of 0.5–3 kg per ton of dry solids (DS) is standard. Underdosing leads to poor solids capture, while overdosing can "blind" the filter rings with excess polymer, preventing water from escaping.
The position of the backpressure cone (or plate) at the discharge end controls the final compression. The optimal compression zone should represent 70–80% of the screw length. If the cone is too open, the sludge exits too quickly without sufficient dewatering. If it is too tight, it increases the risk of a "plug" that can stall the motor. For plants requiring even higher solids, a high-efficiency sludge dewatering press may be considered for specific batch-run chemical sludges. When choosing between these technologies, consult our comparison of sludge dewatering technologies to ensure your equipment matches your sludge characteristics.
| Parameter | Operational Threshold | Impact of Deviation |
|---|---|---|
| Polymer Dosage | 0.5 – 3.0 kg/t DS | Low: Poor capture; High: Screen blinding |
| Backpressure Gap | 10mm – 30mm (typical) | Narrow: High torque; Wide: Wet cake |
| Wash Water Pressure | > 2.0 Bar (30 PSI) | Low: Incomplete screen cleaning |
| Sludge pH | 6.5 – 7.5 | Outside range: Flocculation failure |
Vibration and Sealing Failures: Mechanical Integrity Checks
Because screw presses operate at low RPMs, vibrations are often low-frequency but high-amplitude, which can cause fatigue in the welded joints of the machine frame. Technicians should use a laser alignment tool during every major service interval to ensure the motor, gearbox, and screw shaft are perfectly coaxial.
Uneven base mounting is a common culprit for harmonic resonance. Ensure the machine base is level within ±0.5° in both directions. If vibration persists, inspect the screw shaft for bending. A runout exceeding 0.1 mm per meter of shaft length requires professional realignment or shaft replacement. Additionally, labyrinth seals should be inspected every 6 months. These seals are prone to leakage after 12–18 months of continuous operation due to the abrasive nature of the sludge. Replacing seals annually as a preventive measure prevents sludge from entering the bearing housings and causing catastrophic failure.
Preventive Maintenance Schedule and Best Practices
A structured maintenance schedule reduces screw press lifecycle costs by 25% compared to reactive "run-to-fail" operational models.By logging motor current and filtrate clarity daily, operators can identify trending issues before they result in a system trip. The design gap between fixed and moving rings (typically 0.5–1.0 mm) must be checked monthly; excessive wear here will lead to solids bypassing the rings and fouling the filtrate.
| Interval | Task Description | Key Metric to Record |
|---|---|---|
| Daily | Inspect wash system and filtrate | Filtrate Turbidity (NTU) |
| Weekly | Clean spray nozzles; test E-Stop | Nozzle flow pattern (Visual) |
| Monthly | Measure cake solids %; check ring gap | Dry Matter (% DM) |
| Quarterly | Grease bearings; check belt tension | Vibration (mm/s RMS) |
| Annually | Replace seals; change gearbox oil | Oil metal-particle count |
All maintenance interventions should be recorded in a Computerized Maintenance Management System (CMMS). This data allows the facility to track failure trends—such as recurring motor trips during specific shifts—which often points to operational errors rather than mechanical faults. Ensuring that your automated polymer dosing system is calibrated monthly is perhaps the single most important step in maintaining long-term dewatering efficiency.
Frequently Asked Questions
What are some common screw press problems? The most frequent issues include screen clogging (fouling), motor overload due to high torque, low cake solids (wet sludge), and excessive solids in the filtrate (poor capture rate). Most of these stem from improper polymer dosing or mechanical wear of the ring assembly.
What maintenance does a screw press require? Daily checks of the wash water system and motor current are essential. Weekly nozzle cleaning, monthly ring clearance measurements (target 0.5–1.0 mm), and annual replacement of labyrinth seals and gearbox oil are required for optimal uptime.
How do you unclog a screw press dewatering unit? First, stop the sludge feed and run the wash system for 20 minutes. If the clog persists, manually reverse the screw shaft to break up the "plug," then inspect the inlet and discharge zones for foreign objects or dried sludge buildup.<